es:Links Manager
| This article may be outdated and contain information pertaining to an older version of WordPress. Please take caution when following the procedure, as many things may have changed. |
Contents
The topics covered in this article are adding, editing (or managing), and deleting links and link categories, making use of the advanced fields when adding links, and, lastly, importing links from another system. These are all the features of the Links section of the WordPress Administration Panels.
Managing Links
The Manage Links SubPanel is the main SubPanel for link administration. Here you can view all your links, or just the links from a particular category. Upon clicking the Edit button, this pages transforms into a view of just that one link, and you are able to change all of the options for that link.
A List of All Your Links
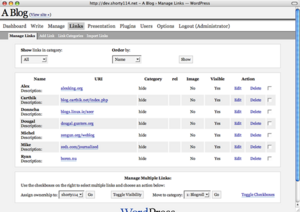
In the Manage Links SubPanel, all Links are displayed in tabular format. To change which links are displayed, use the options in the top box of the SubPanel:
- Show Links in Category [category]
- This dropdown allows you to select by category which links are displayed in the Table of Links. By default, "All" is selected and all of your links are displayed.
- Order by [ ]
- You can sort the Table of Links by Link ID, Name, URI, Description, Owner or Rating with this dropdown. By default, the links are sorted by name.
- Show
- Clicking this button applies the settings you select in the two dropdowns.
Manage Multiple Links
You can modify many links at once by using the options found at the bottom of the SubPanel. Changes are applied only to the links whose checkboxes in the Table of Links are checked. The following actions are available.
- Assign ownership to [user]
- By selecting a user from this dropdown and clicking its "Go" button, all the checked links will be assigned to that user.
- Toggle Visibility
- Clicking this button toggles the Visibility setting off all checked links, changing "Yes" to "No" and "No" to "Yes". See Hiding Links.
- Move to category [category]
- You can move all of the checked links to a specific category by selecting that category in this dropdown and clicking its "Go" button.
- Toggle Checkboxes
- This link will invert the checkbox selection: all checked checkboxes will be unchecked and all unchecked checkboxes will be checked.
Links are displayed as rows in this table with the following columns:
- Name
- The name (in bold) of the link and its description.
- URI
- The destination URI of the link.
- Category
- All links must belong to one category. The category to which that link is assigned is shown here.
- rel
- This column displays all of the XFN relationships for this link. See more at Link Relationship (XFN).
- Image
- Whether or not there is an image associated with this link: a simple Yes/No.
- Visible
- Whether or not the link is visible on your site. See Hiding Links.
- Edit
- This button takes you into Link Editing Mode so you can edit this link.
- Delete
- Deletes the link. You get a warning asking you to confirm the deletion because deletion cannot be undone.
- [ ]
- A check box for use when Managing Multiple Links.
Adding Links
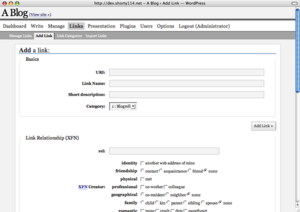
To add a link, navigate through the Administration Panel to the major section Links, then to the subsection Add Link. You should arrive at a screen similar to the one on the right. Let's go through the sections one by one.- Basics
These fields are the basics, as the title suggests. All of these fields, except for the Short description, are required.
- URI
- The URL to the web page you're linking to, with the http://.
http://example.com/
- Link Name
- The title of the link is shown as the link text.
John Doe's Blog
- Short description
- Not required, but this tells the user something about this link. Depending on the category's settings, this may or may not be displayed under the link, but will always be shown in the link's title (the tooltop-style box that comes up when you move your mouse over a link).
The blog of John Doe, unknown blogger.
- Category
- Select the category in which to add the new link. Default WordPress installations come with one category, Blogroll. Adding additional categories will be covered later in this article. If that category has Auto-Toggle enabled, it will be labeled as such. Auto-Toggle hides all other links in this category so that the new link is the only one displayed on your site. This can be used as an effective way to let your viewers know you've added something new. Usage: YES enables and NO disables Auto-Toggle.
- Note: If Auto-Toggle is set, only one link in this category will ever be visible, even if you try to make other links visible manually in the Manage Links SubPanel.
Example: Blogroll
- Link Relationship (XFN)
- XFN (Xml Friends Network) is a way to define your relationship with the linked person. For example, if you work with Harriet Smith, and you link to her blog, you can check co-worker or colleague, symbolizing that she is one of those. Same with crushes, dates, and you can also say whether this is another one of your sites.
- XFN relationships are optional for WordPress links. You can leave everything in this section blank and all your links will still work. Defining Relationships with XFN makes the links defined on your weblog more understandable to machines that will process your pages.
- rel
- The rel attribute to the a tag symbolizes RELation. You can do nofollow if you don't want search engines to follow the link. You separate multiple rel keywords with a space.
nofollow

or

author smart
Advanced
The Advanced Fields are not required, but can add extra information to the link. Here you set the link image, RSS, notes, rating, and other such goodies. These are optional.
- Image URI
- The URI to the image you want to display with the link. This can either be an absolute URI (http://some.site/images/image.png) or a relative URI (/images/some.png). You may want this to be rather small, around 16x16, similar to a favicon.ico.
http://example.com/images/foobar.png

/wp-content/images/ye-site-icon.png
- RSS URI
- RSS is a form of syndication, used to generate WordPress Feeds. When displaying RSS links, this is the option to display the RSS link next to the site link.
http://example.com/feed/
- Notes
- Like someone's design? Do they use a plugin you want to use on your site? This is where you can store notes about the link.
Example: Nice design, from #wordpress.
- Rating
- When you add or edit a category, you have the choice of sorting it by rating. This is where you set the rating. You can rate with a scale of 1-9, with 0 being no rating.
Example: 3
- Target
- The a:link or hyperlink tag has a target attribute, which this setting defines. You'll have to do this if you're using an XHTML 1.1 or XHTML 1.0 Strict theme. There are three options:
- none: none is the default and it will open the link in the same window.
- _top: _top is if you're using frames, so it clears the window and moves the user to top of the linked page for non-framed pages.
- _blank: _blank opens the link in a new window.
- Visible
- You can keep individual links from being visible on your site by hiding them with the Visible option. It has two values: YES to hi be visible and NO to hide or not be visible.
Example: Yes
Just fill in all the fields that you want to, and hit the Add Link button.
Editing Links
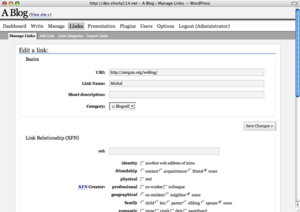
To edit a link, in case of an error or change in the link information, WordPress provides an Edit Link option.The Links > Manage Links subpanel features an Edit button on the link's table row. This brings you to the Edit a Link subpanel.
This mode is essentially the same as the Add Link SubPanel. The only difference is that the buttons to save your work are called "Save Changes" instead of "Add Link". When you're done you can hit one of the three Save Changes buttons, whichever one is closest to the section that you're working on.From within the Edit Link panel, you can change any or all of the options for the link, including XFN relationships, category, address, description, RSS URI, or any other detail.
Deleting a Link
To delete a link, go to Manage Links. From the table list of links, identify the link you wish to delete. Click the Delete link for that link to delete it. Remember, you will not have a chance to cover from this delete. It makes a permanent change to the database.A popup window with a confirmation should appear. Choose OK or Cancel if you hit the Delete link by accident. Remember, this is the only chance you have.
After making your choice, you will be directed back to the Manage Links page.
Link Categories
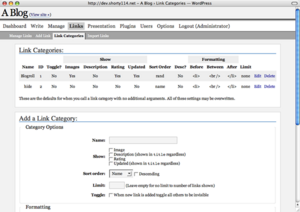
Links in WordPress can be organized into categories, all the better for organization. The default installation of WordPress automatically sets one category, Blogroll. You are given the ability to add, edit and delete categories.- Note: You can't delete the Blogroll category, but you can edit it. You can rename it if you prefer another name.
Adding a Category
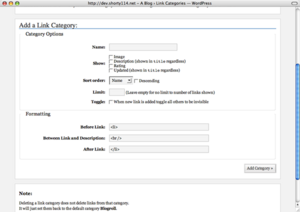
To add a category, navigate to the Manage Links > Link Categories SubPanel. The Add Link form is farther down the page.The following options are available:
- Name
- Name of the category. This is the name that will display on your site in your Links list.
Example: My Uber-kool Category
- Show
- What you want to show with the category. You can choose any, none or all of these options. All of these depend on whether you have entered values when you added the link:
- Images associated with the links in this category
- Descriptions of links in this category
- Ratings of the links in this category
- Updated indicates whether a link has been recently updated or changed. Note: Updated means when you last updated the link entry, not when the linked webpage was updated.
Example: Image, Description and Rating

Example 2: Description
- Sort Order
- How you want the links to be sorted when they're displayed. Possible options are:
- Name
- ID
- URL
- Rating
- Updated
- Random
Example: Random

Example 2: Id, descending
- Limit
- Got a whole bunch of links in that one category? Put a number in here to limit how many are shown. If you set the Sort Order to Random, this will show different links every reload/view (if you have enough links in the category, of course).
Example: 5
- Toggle
- Auto-Toggle hides all other links in this category so that the new link is the only one displayed on your site. If used, only this link will be visible in the category, even if you try making them manually visible in the Manage Links subpanel. Usage: YES enables and NO disables Auto-Toggle.
Example: Yes
Editing a Category
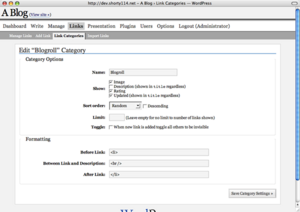
To edit an existing caegory, go to Link Categories SubPanel. From the table list of link categories, choose the category you wish to edit and click the Edit link.
The category fields to edit and change are the same ones in the previous section on adding link categories.To save your changes, click Save Category Settings. This will retrun you back to the Link Categories section.
Deleting a Category
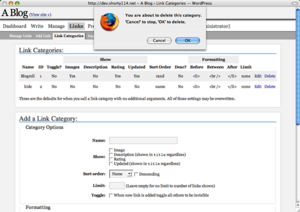
To delete an existing category, use the Link Categories SubPanel.From the table list of categories, find the category you wish to delete and click the Delete link. Remember, once you have deleted a category from your database, it cannot be undone. This is a permanent delete.
A popup window will appear requesting confirmation of the delete. Choose OK to confirm the delete or CANCEL to back out of the delete.Make your choice, and it'll send you back to the Link Categories screen.
Formatting
You can alter how WordPress displays the list of links from this category by modifying the text found in the following three text boxes. However, these options are only used by some themes.
The following template tags are used only with Link Manager:
- Before Link
- This string of characters or HTML tags which will be inserted before every link in the list of links from this category.
Example: <li>
- Between Link and Description
- When a category is set to show the description with the link, this is what separates them.
Example: <br />
- After Link
- This string of characters or HTML tags which will be inserted after every link in the list of links from this category.
Example: </li>
To actually add the category, just click Add Category or Save Category Settings to save the information you've entered.
Importing Links
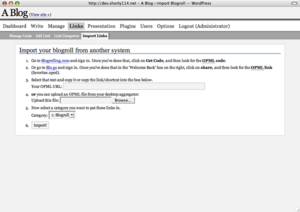
WordPress makes it easy to import links into Link Manager. The Import Links SubPanel takes an OPML file from a link manager service such as BlogRolling, Blo.gs, and others and imports the information into Link Manager.OPML (Outline Processor Markup Language) is an XML-based format for transferring information in an environment-independent form. More information at OPML.org.
From the Import Links SubPanel, you have two choices. Depending upon the services you use, you will choose one of these. If you use another service that isn't on there, proceed with similar actions on that service. If you don't know how to, check with your service.
- Go to Blogrolling.com and sign in. Once you’ve done that, click on Get Code, and then look for the OPML code.
- Or go to Blo.gs and sign in. Once you’ve done that in the 'Welcome Back' box on the right, click on share, and then look for the OPML link (favorites.opml).
- Select that text and copy it or copy the link/shortcut into the box below.
Your OPML URL: Enter the OPML address - or you can upload an OPML file from your desktop aggregator:
Upload this file: Enter the OPML address - Now select a category you want to put these links in.
- Click Import and the file will be imported.

