zh-cn:使用WordPress第一步
Languages: English • Steps With WordPress 日本語 Русский • (Add your language)
Contents
现在该怎么办?
你已经很轻松地完成了WordPress著名的五分钟安装。WordPress拥有许多令人惊讶的特点。现在你已经完成了安装,接下去该做什么呢?
让我们一步一步地来浏览你的WordPress站点并且学习这些不同的功能是如何工作的以及如何让你的站点变得个性化。
在本教程的第一部分,我们要求你,除非是教程的一部分,否则不要修改程序内的任何东西。只要按照下面这些简单的步骤做,不久你的站点就会完全改变。
从头部开始
从登录到管理面板开始。这是站点的核心,这是你发挥创造力的地方,这是写下精彩的文章和把站点设计得最好和最可爱地方。这是你的站点组织结构开始的地方,并且这仅仅是一个开始而已。
在管理面板中,在屏幕菜单的头部,选择“查看站点”。喜欢她吗?不喜欢?没关系,就这样看着她。这是你接下去要花费数分钟、数小时、数周甚至数月时间的地方......
尝试运行你的WordPress站点
在你开始改变设置以及弄明白这一切是如何工作的之前,应该花一些时间看一下默认的站点。看一下默认的WordPress主题是如何布局和工作的是很重要的事。在你开始添加一些特殊的特点以前把这看做是运行测试。
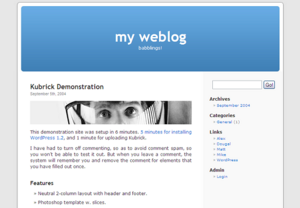
你正在看着的页面布局叫做主题。这是站点的展示,站点的样式。默认的主题以顶部的带有你站点标题的蓝色头部为特点。在站点的侧边你会看到一些文字和链接,这是页面的侧边栏。页面的中间主要部分叫"post"。页面的底部叫做"footer"。
让我们看一下"post"部分。有一个标题,标题下面有一些信息。这些信息叫做"post meta data"包含了关于这个"post"的一些信息,比如创建的日期、时间、作者以及这个"post"所在的目录。
继续向下你会看到页面的最后有一栏。这叫做"footer",现在上面写着(你的博客)自豪地采用"WordPress"。
回到侧边栏,你会看到各个带着不同的信息部分。在他们中间你可能看到一列内容包括近期文章、日期、分类等。这是站点的导航部分,访客用这部分内容浏览你的站点,根据不同的分类和时间查看相应的日志。
一切都在细节中体现
花点儿时间留意一下页面布局和设计的细节部分。移动你的鼠标,划过这篇日志的标题。你会发现颜色发生了变化。这叫做"hover"。当你用鼠标划过一个链接时大多数主题都有独特的颜色及其变化。移动你的鼠标,划过侧边栏的任何链接。他们发生变化了吗?变化是一样的吗?你可以在页面的不同部分改变他们的链接颜色,让他们看起来不一样,但是通常情况下,他们是一样的。留意一下链接的颜色,应该使用什么颜色以便他们能从剩余的文本中脱颖而出。
观察设计的细节并且记住他们处在页面的哪个位置。过几天,你有可能想要改变这些细节,比如在页面顶端蓝色盒子里的标题颜色。如果你记得那部分叫做"header",那么当你想改变它的时候,你就会知道在样式表中的"header"部分寻找并进行修改,样式表是一份控制页面外观的文件。
快速地环顾一下
现在你只有一篇日志。它在被称为主页或者首页的页面里。如果你点击这篇日志的标题,会进入这篇日志的详细页面中。首页上都是你近期添加的日志。每一个日志标题都会连接到对应日志的详细页面中去。一些主题的设计者把他们日志的详细页面设计得与主页不一样。点击日志标题后,你就被带到了另一个和首页看起来不一样的页面中去了。
在详细页面中同样地留意一下布局并观察一些不同的设计元素。头部不一样吗?变小了、变大了或者颜色变化了?有侧边栏吗?在WordPress默认的主题中,侧边栏 在详细页面中消失了。观察所有的细节,留意他们的不同之处。
日志通常被储存在目录中,所以你可以将相关的话题放在一起。现在你只有一个目录,不久之后会有更多。点击这个在首页的侧边栏出现的目录。你进入了包含所有属于那个目录的日志的页面中。同样的,观察它的布局,留意与首页、及详细页面不同的地方。
用同样的方法操作“归档”栏目。你可能只有一篇日志,就看一下页面是如何布局的。他们可能发生了变化,也可能没发生,但是从头到尾看一下他们是如何起作用的。
所有的这些变化都是由一些叫做模版的文件造成的,你可以从模版入门那儿学到更多知识。现在,让我们继续浏览WordPress剩下的部分。
Test Drive the WordPress Admin Panels
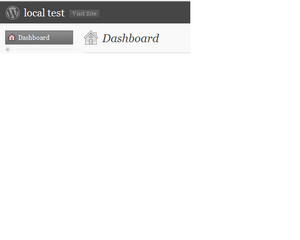
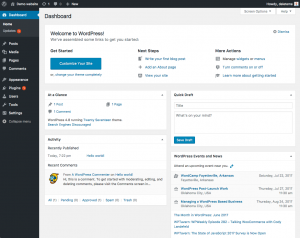
Now that you have an idea of how your site looks and what the different layout sections are called, it's time to test drive the WordPress Administration. This is like familiarizing yourself with the dashboard of your new website. In fact, the first page you see after logging in is called The Dashboard.
The Dashboard is a new feature in WordPress v1.5. It helps to keep you up to date on new and interesting bits of information from the many WordPress resources. In the corner it also features a list of the most recent activity you've done on your site.
Across the top of the Admin screen is the main menu, which says:
The links in the above list will take you to a series of articles that will guide you step-by-step through every aspect of the Admin panels. You're anxious to get started, so for now, let's start with the Users panel.
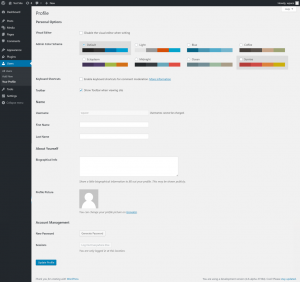
Click on the Users tab. The screen will change and you will see the panel called Profile. This is where you will enter information about you, the author and administrator of the site. In the next tab called Authors and Users you can set up more authors. Let's stick with you for right now. Fill in the information and click Update Profile when done.
Now, let's look at the powerful feature functions of the WordPress Admin.
Quick Changing the Look
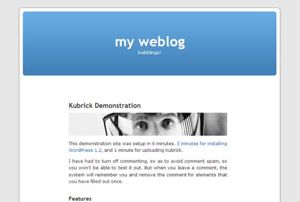
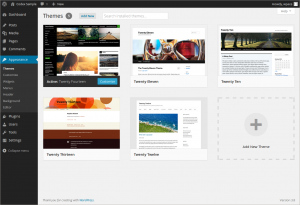
The Presentation panel allows you to change the look of your site using Themes. Themes are presentation styles that completely change the look of your site. Designed by WordPress users, there are hundreds of themes available for you to choose from. In your Presentation panel, you will see two themes, classic and default. To try this quick-change process, simply select Classic and then click View Site to see how it looks. Wow, you have another look and nothing else on the site has changed. It's that easy.
Go back to the Presentation panel (Back button on your browser) and select Default to bring the design back to what you had. To see it again, click View Site, and there it is. Honestly, it is that simple.
Writing and Managing Posts
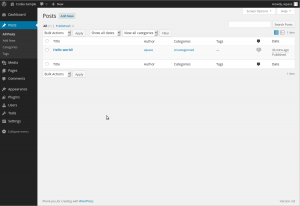
Back in the Admin panel, take a look at the Write panel, and the Manage panel. You can use the tabs under the Write Menu to write posts and Pages. Using the tabs under the Manage menu, you can manage the posts and Pages in your site.
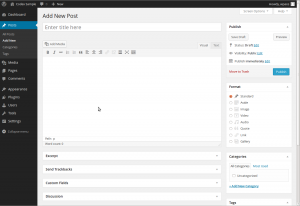
Let's start by making your first test post in the Write Post tab.
If the screen looks a little intimidating, the Codex article on Writing a Post will take you step-by-step through the process of writing a post. Take a moment to read through the article and post your first entry and then return to this article and we'll take you onto the next step.
If you are in a hurry, then simply fill in the blanks, one by one, in the post beginning with the title and then write a little test message in the post window. This is just for a test, so you can write anything you want. When you are done, click PUBLISH below the post entry window and it is done. You will then see a blank Write a Post screen and you're ready to write another one. Go ahead. But do only three to four entries. We have more exciting work ahead of us.
Now that you've gotten a feel for writing posts, you can view your posts by clicking View Site at the top of the screen. Now it's time to get down to the real work.
Planning Session
All good websites come from a good plan. Sounds redundant, but it's true. If you want to create a good and solid website, you need a good and solid plan. I know it's hard to do, and I know you want to keep poking and playing with this exciting program, but it is time to take a break away from your computer and turn to the old paper and pen. That's right, we're going back in time to when people actually wrote things down.
On a piece of notebook paper, or whatever is lying around, describe your site. Take five to twenty minutes to come up with a purpose for your site, or better yet, call it your Mission Statement.
Answer the following questions:
- What am I going to do with this?
- Who is going to read this?
- What kinds of information will I be posting?
- Why am I doing this?
- Who am I doing this for?
- How often am I going to be posting and adding information?
Now, compile this information into a paragraph so it looks like this:
and cover the topics of A, B, and C. The audience will
be __________ ________________ _______. I will be adding
posts every _____________ about ________ _______ ______________.
Using the Information
From this exercise, we've gathered a lot of information. We've uncovered information on how you might layout and design your site. If you know your audience is mostly made up of young people under the age of 25, you will probably want a fashionable look ranging from wild colors and crazy graphics to dark foreboding tones. Something appropriate for that generation. If you are providing factual information about a serious subject, then you will probably want a more conservative look where the information is more important than a lot of pop and flash.
You probably already have a design idea in mind, or you will be copying over from your previous site, but take a moment to use this information to reconsider your design, and to see how what you want will work with the WordPress options.
You have also uncovered the possible categories for your site. The topics and subjects you will be covering are listed in your purpose statement. Let's say your purpose statement said,
- "The website will be dedicated to providing news and information on computers, web pages, and the Internet and cover the topics of computer tips, web page design, and Internet news."
Your topics are your categories. Write your categories down below your purpose paragraph and notes about your web page design.
Now, what subcategories might be under these topics? Under Computer Tips, you might want to segregate them by Windows, Linux, and Mac. Or maybe Software and Hardware. You can have sub-sub-categories, but let's stop with subcategories for right now. Write these down.
Remember the question about why you are doing this? Is it because you have valuable and timely information or knowledge to share, because you want to talk about a subject that interests you, or maybe because you just think it will be fun to do. Why not? Everyone's doing it!
Understanding the timeliness of the information you want to present on your site helps you organize the information on your website. Your website is organized by several different methods. If the date of when you posted the information is critical to the success of the page, then having links to your posts referenced by date is important. If the information itself is more important and timeless, then having your posts referenced by category is the best choice.
Have you noticed that you are starting to lay out your website? If you remember our earlier test drive of your new WordPress website, we examined the sidebar menu. This is the area where your past posts are organized. If you take another look (yes, you can go back to your computer for a moment), you will see the sidebar is laid out in a list by Archives by date, Categories by category, and may even feature a calendar (turned off in the Default Theme but visible in the Classic Theme).
As you lay out your website on paper, consider whether you want both categories and dates, or just one of them in your sidebar. What information you have and how you want to help the user find the information is critical to your website design.
As you think about what information the user will need to know, you have to consider what information you are willing to share with them. That information may include how to contact you, what the purpose of the site is, who you are, and what your expertise is.
WordPress v1.5 offers a new feature called Pages which makes the process of presenting this information in an easier fashion. Pages, similar to posts, are most commonly used to present unchanging information such as Pages for About Us, Contact Us, Sign Up for Our Mailing List, and other static information. Before creating your individual Pages, you need to think about what information you would like the Page to hold. Write down the possible Page titles and describe the information you are willing to share online on each Page.
Comments
Part of the fun of WordPress is the ability to have viewers leave comments on your site. It creates a dynamic interchange between you and the viewer. Do you want comments on your posts? Comments on posts come in a variety of forums, from pats on the back (Good job! Like the post!) to extensive conversations and commentary about the posts turning into long chats. Or maybe you are seeking comments that add to the information you've posted. How you present your comment form, and whether you do or not, invites people to comment.
Responding to comments and moderating them can also take up a lot of time. If they are critical to your site, then include them and consider how you want them presented. Go back to your test site; the first post created at the time of installation includes a sample comment. You can even make a few comments yourself on the posts you created. Take a look at how they are laid out and consider how you might want them to look to fit into the design and layout of your site.
When you have reached your decision about how you want to handle comments, take time to read through the article on comments and WordPress discussion options to help you set those features.
With this basic information, you are ready to return to your computer and start laying out your site and setting it up.
Setting Your Site Up
Before you get to the graphic look of your site, let's do a little more administration to your site to set it up. Consider making your first plugin installation the Codex and Forum Searcher Plugin. It allows you to search both the WordPress Codex and WordPress Support Forum from your WordPress Administration Panels. Click on one of the search results and the page will open in a new window or tab so you can have the article or discussion open while working on WordPress. This will make your transition to WordPress a much gentler one with information right at your fingertips.
You can also work from this page by clicking on a link with a Right Click and opening the documents in a new window or tab, so you can read along as you work on your site.
Let's start with making those categories written down on your list.
Create Categories
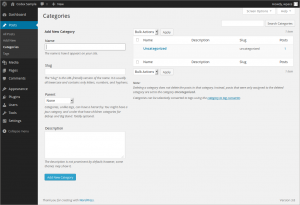
In the Manage > Categories tab, click Add Category and fill in the information about your category. Continue to add your parent categories, going down the list. Hold off on entering sub-categories until all the main categories are entered.
- NOTE: You can add any new categories any time, but make a note of the fact that categories can be sorted in WordPress in two ways: by name (alphabetically) or by ID number. As you enter the categories, they are assigned an ID number. It is difficult to change this, so if you don't want your categories sorted alphabetically, enter them in the order you want to see them presented on the screen.
When you have the parent categories entered, enter your sub-categories. In the pull down menu for Parent Category, you can select the parent to the sub-category you are adding. When you view your categories in the Manage > Categories panel, you will see the categories listed like this:
Computer Tips
- - Windows
- - Linux
- - Mac
Internet News
Web Page Design
- - Web Standards
- - WordPress
- - - Plugins
- - - Themes
- - - Plugins
Put Posts in Categories
Let's put some of your test posts into categories so you can see how this works.
From the Manage > Category panel, click on the tab for Posts. You should see the test posts you entered here. To the right are three links that say: View - Edit - Delete. Click on Edit to edit one of the posts. On the right side of the Edit Post screen you will now see your Categories. Choose one of them by clicking in the box next to it. Then scroll down the page and click SAVE. Repeat this for your other test posts, putting each one in a different category.
Now view your page by clicking View Site at the top of the Admin panel. Do you see the categories listed in the sidebar now? Great. If you are missing a category, that usually means that there are no posts in it. This is the default function of WordPress, so not to worry. When you add a post to the "missing" category, it will appear on your web pages. Click on one of the categories and you will be taken to a page for just that category. You should see the posts that went into that category. This is a generated Category page.
Now, click on the Archives for the month showing. Now you are visiting a generated page of your posts listed in chronological order for this month - well, specifically for today only. Two methods of finding the same information.
Preventing Spam
There is more to think about when it comes to having comments on your site. Unfortunately we live in a world where spam is a fact of life. It is recommended that you begin battling the comment spammers with the helpful article, Introduction to Dealing with Comment Spam.
What is Next
You've now done all the basics for your new WordPress website. You know how to write a post, create a category, and how to view your site's information by category and archive. You can start the customization process, and when you are done, don't forget to delete your test posts! Then start writing some wonderful information to share with your new-found public!
Customizing Your WordPress Site
Once you are familiar with how WordPress works, it's time to get creative and start customizing. The tutorial now splits into different subjects that require no order. From here on you can do whatever you want, adding and subtracting, perfecting and scrambling your site at will. The amount of effort you put into the site is now up to you. You can work with the two WordPress Themes that came with the installation, or seek out another Theme that better meets your needs. You can totally customize all the links and information, or get serious and completely re-design the entire site to do whatever you want. You have the basics, the rest is up to your imagination.
- Finding a WordPress Theme
- Look for one that better suits the look you desire on your site.
- Customizing the Look
- When you are ready to plunge into the code, you can customize the look and layout of the site through CSS and modifing the Themes (or create your own).
- Enhance Your Site with Plugins
- Plugins add function and sometimes fun to your site. There are hundreds of different plugins from adding custom links like related articles to your sidebar to adding weather reports.
WordPress Themes
There are hundreds of WordPress Themes to choose from. All do basically the same thing but graphically present the information in a myriad of ways. Choose a few that look interesting to you, and meet your audience's needs and your desires, and then test drive them following the test drive instructions above. Click through the whole site, the categories and archives as well as the individual posts to see how the Theme handles each one. The look may be nice on the front page, but if it handles things in a way you don't like on the single post, then you will have to dig into the code and make changes. Not ready for that, try another theme.
If you run into problems, check out the Codex's Troubleshooting Themes article.
Customizing The Look
If you are familiar with CSS, HTML, and even PHP and MySQL, consider customizing the Theme to your own needs. This is not for the timid, and it is for the informed and experienced. If you want to expand your web page design and development skills, WordPress can help:
- Using Themes
- Theme Development
- Stepping Into Templates
- Templates Files
- Blog Design and Layout
- CSS Overview, Tips, Techniques, and Resources
- FAQ - WordPress Layout
- Stepping Into Template Tags
- Template Tags
- CSS Troubleshooting
- CSS Fixing Browser Bugs
WordPress Plugins
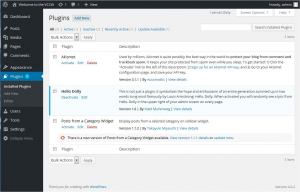
WordPress Plugins are also known as add-ons or extensions. They are software scripts that add functions and events to your website. They cover the gamut from up-to-date weather reports to simple organization of your posts and categories. Plugins are designed by volunteer contributors and enthusiasts who like challenges and problem solving. They are usually fairly simple to install through the WordPress Admin Plugin panel, just follow the instructions provided by the plugin author. Remember, these are free and non-essential. If you have any problems with plugins, contact the plugin author's website or plugin source first, then search the Internet for help with that specific plugin, and if you haven't found a solution, then visit the WordPress forums for more help.
Above and Beyond the Basics
The exciting thing about WordPress is that there are few limits. Thousands of people are using WordPress for blogging and for running their websites. All have a different look and different functions on their sites.
What you do from here is up to you, but here are a few places to take that first step beyond the basics:
- WordPress Features
- Working with_WordPress
- Using Pages
- Understanding the WordPress Loop
- Troubleshooting
- Using Permalinks
- Press It - Post to your site from the web instantly!
