Creating Admin Themes
Languages: English • Admin Themes 日本語 Русский • (Add your language)
Contents
WordPress' flexible nature allows for almost every part of it to be easily changed. Creating a custom WordPress Admin Panel Theme is no different. There are essentially two ways to make a WordPress Admin theme: with a Plugin or by simply changing the CSS. The Plugin method is the easier of the two, allowing you to install WordPress Admin Themes quickly and easily. You literally "plug it in" and it works.
If you are the creative type, we also have instructions to help you design your style sheet for the Administration Panels, and even how to turn your Admin Theme into a Plugin for easy distribution to the public.
Using Admin Theme Plugins
WordPress Plugins allow a user to easily add functionality to their blog without editing core WordPress files. There are several WordPress plugins available that will allow you to use a WordPress Admin Theme with little or no fuss.
To do this, upload the Admin Theme Plugin to your plugins folder and then activate it on your Plugin Panel. Simple and easy.
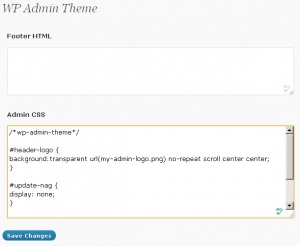
Other plugins, like WP Admin Theme, allow you to change your layout on the fly, without needing to create your own plugin.
Styling the Admin Theme
The best way to design your own Administration Panel Theme is to make a plugin, even if you're never going to share the code with anyone else. As a plugin, the Admin Theme includes a function that will instruct WordPress to use a new stylesheet for displaying the Admin Panel. One of the distinct advantages of making a plugin is that if you ever want to revert to the default style, all you have to do is deactivate it.
You can also utilize the mu-plugins folder for your plugin.
The Admin Style Sheet
The default Admin Theme style sheet is very complex, covering all aspects of the Administration Panels thoroughly. Not all the parts and pieces may need to be changed to recreate your Admin Theme. You can look at the files stored in/wp-admin/css to see all the style components that go into the admin dashboard.
Here is a partial list of the important style references used in the Administration Panels. Per CSS web standards, # denotes a style ID and . denotes a style class.
- #wphead
- The main title of the admin panel. Used to display the name of the blog and a link to View Site.
- #adminmenu ul
- The main level navigation bar, for links: Dashboard, Write, Manage, etc.
- #adminmenu2 ul
- The sub level navigation bar, for links (example: under Manage: Posts, Pages, Categories).
- .wrap
- The basic wrapper for all content in the admin panel, set in a <div>.
- #zeitgeist
- The sidebar on the Dashboard displaying Latest Activity and Blog Stats.
- #footer
- The footer at the bottom, with Wordpress logo, version number, and help links.
- .wrap h2
- Individual Page headers for the various subpanels, like General Options.
The changes you make can be major or minor. For instance, you can change the background color, add a background image to different sections, change the font, or even just do a minor color or design change to the Quicktag buttons. Feel free to use your imagination and create whatever effect you want.
Creating an Admin Theme Plugin
Admin theme plugins can be used to change the header or footer of admin pages in different ways.
One benefit of admin theme plugins is that they can be easily installed with little effort by the user, and just as easily uninstalled or deactivated, returning the Administration Panels to their original state.
We begin by telling WordPress to link to a new style sheet.
In a text editor, in a new document, put the following:
<?php

/*
Plugin Name: My Admin Theme
Plugin URI: http://example.com/my-crazy-admin-theme
Description: My WordPress Admin Theme - Upload and Activate.
Author: Ms. WordPress
Version: 1.0
Author URI: http://example.com
*/

function my_admin_theme_style() {
    wp_enqueue_style('my-admin-theme', plugins_url('wp-admin.css', __FILE__));
}
add_action('admin_enqueue_scripts', 'my_admin_theme_style');
add_action('login_enqueue_scripts', 'my_admin_theme_style');

?>
This plugin simply allows you to customize the CSS of the admin dashboard via a file called wp-admin.css in your plugin folder.
If you wanted to change the #wphead format to look blue (like in the above image), then you would add in:
#wphead {
  border-bottom: MidnightBlue 1px solid;
  background-color: #E4F0FE!important;
  background: -moz-linear-gradient(bottom,#E4F0FE,#B0C4DE);
  background: -webkit-gradient(linear,left bottom,left top,from(#E4F0FE),to(#B0C4DE));
}
In addition to using the admin_head Plugin API hook for stylesheets, you also have the option to add a function that allows you to add content to the admin_footer. For example, you might want to put a notice about the theme in the footer. Here is how to add it to your plugin:
function my_crazy_admin_footer() {
   echo '<p>This theme was made by <a href="http://example.com">Ms. WordPress</a>.</p>';
}

add_action('admin_footer', 'my_crazy_admin_footer');
Which looks like this:
Save the plugin and upload it to your site. Select it from the Plugins Panel and see if anything about My Admin Theme appears. If it does, you are on the right track!
Another way would be to use filters instead of actions:
add_filter('admin_footer_text', 'left_admin_footer_text_output'); //left side
function left_admin_footer_text_output($text) {
    $text = 'How much wood would a woodchuck chuck?';
    return $text;
}

add_filter('update_footer', 'right_admin_footer_text_output', 11); //right side
function right_admin_footer_text_output($text) {
    $text = 'That\'s purely hypothetical.';
    return $text;
}
Which looks like this, totally replacing the footer:
Source: WP Glee
Change Log-In page's style
You can use the login_head action to add a style sheet to your log-in page. To get this working, copy the login.css file from /wp-admin/css/ you can append the following to the original plug-in you've created.
function my_login_css() {
  echo '<link rel="stylesheet" type="text/css" href="' .plugins_url('login.css  ', __FILE__). '">';
}

add_action('login_head', 'my_login_css');
Advanced CSS Styles
Sometimes there are places where CSS just cannot achieve the look you want without making modifications to the HTML of the Administration Panels.
A popular CSS style is to create rounded corners on "boxes" of content. The technique involves adding divisions or wrappers to the HTML architecture to achieve the effect. Since we do not want to get into the core Administration Panels to make these changes, which will disappear with the next upgrade, you can use the DOM (Document Object Model). The DOM is a way of dynamically accessing and updating content, structure, and style of documents.
In this example, using the Transparent Rounded Corners effect from 456 Berea Street, you can add the Javascript provided on the site to your Admin Theme Plugin, without editing the WordPress source.
Download the script and save it to your blue-steel folder as javascript.js. Change the mr_blue_steel() function to:
function mr_blue_steel() {
    $url = get_option('siteurl');
    $dir = $url . '/wp-content/plugins/blue-steel/';
    echo '<link rel="stylesheet" type="text/css" href="' . $dir . 'wp-admin.css" />';
    echo '<script type="text/javascript" src="' . $dir .'javascript.js"></script>';
}
This script uses a single "hook" (cbb) to create many divisions around the container. For this to work, open the Javascript file and change all references of cbb to wrap to match the wp-admin.css standard style references.
Resources
- get_option
- get_settings (Deprecated 2.1)
- Writing a Plugin
- Plugins
- Blog Design and Layout
- WordPress and CSS


