Links Manager
Languages: English • Français • 한국어 • (Add your language)
As of Version 3.5, the Links Manager and blogroll are hidden for new installs and any existing WordPress installs that do not have any links. If you are upgrading from a previous version of WordPress with any active links, the Links Manager will continue to function as normal. If you would like to restore the Links panel to your install you may download and install the Links Manager plugin. This page is still relevant for any user with an existing Links Manager or with the plugin installed.
WordPress allows you to store a set of external links, also known as your blogroll. These links can be put into categories, imported, exported, added, deleted, and edited. The link categories can also be added, deleted, and edited. This article describes how to do all of the above, using the Links section of the WordPress Administration Panels.
Contents
Managing Links
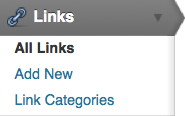
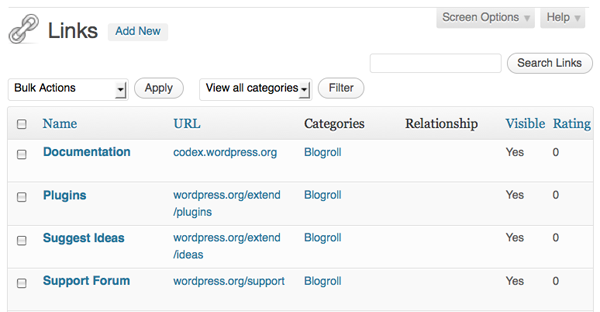
When you click on "Links" in the navigation menu on the left of your dashboard screen, you will come first to the Manage Links SubPanel, where you will see a list of all of your links.
Listing Links
In the Manage Links SubPanel, your links are displayed in a tabular format. Each link is a row in the table, and the table has the following columns:
- Name
- The name of the link (in bold) and its description.
- URL
- The URL (location) of the link.
- Categories
- The categories that the link is in.
- Relationship
- The XFN relationship for this link.
- Visible
- Whether or not the link is visible to visitors on your site.
- Rating
- A ranking of the Link, which can be used to sort links within Categories.
You can change the display in the following ways:
- Restrict to just one category
- Choose a category from the "View All Categories" drop-down and click Filter, and the list will be restricted to the category you chose.
- Change the sorting order
- You sort the link entries by Name or URL by clicking on the small black arrow in the header of the table. By default, the links are sorted by name.
Adding Links
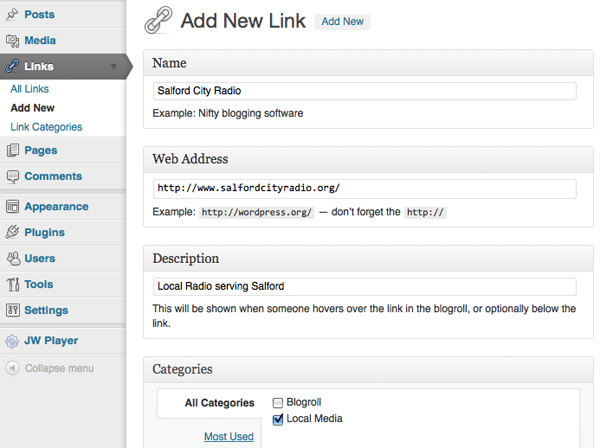
When you click Links in the navigation menu, and then click Add Link, you will come to the Add Link SubPanel, where you can add a new link to your list.
The screen looks similar to the image above, and has the following sections - Sample input is shown in parentheses.:
- Name
- The text that will be shown on your blog screen for the link (John Doe's Blog).
- Web Address
- The URI of the web page you're linking to, with the http:// (http://example.com/).
- Description
- If your Theme includes it, this descriptive text will be put on the screen after the actual link. It will also be shown to the user as a "tool-tip" when they hover their mouse over the link. (The blog of John Doe, unknown blogger).
- Categories
- Select the category for the link. Links can be put into multiple categories.
- Target : Specifies the target attribute that will be put onto the link's a tag when displayed on the screen, which tells where the page will appear if the user clicks on the link. There are three options:
- none: open the link in the same window or frame (default).
- _top: if you're using frames, open the link at the top level of the frame system.
- _blank: open the link in a new window.
- Link Relationship (XFN)
- XFN (Xml Friends Network) is a way to define your relationship with the linked person. For example, if you work with Harriet Smith, and you link to her blog, you can check co-worker or colleague, symbolizing that she is one of those. Same with crushes, dates, and you can also say whether this is another one of your sites.
- XFN relationships are optional for WordPress links. You can leave everything in this section blank and all your links will still work. Defining Relationships with XFN makes the links defined on your weblog more understandable to machines that will process your pages.
- rel - Specifies the rel attribute that will be put onto the link's a tag when displayed on the screen. Some possible values are nofollow (if you don't want search engines to follow the link), author, and smart. Multiple rel keywords should be separated with spaces.
- Advanced
- The Advanced fields can add extra information to the link.
- Image Address - An image to be displayed with the link. This can either be an absolute URI (http://some.site/images/image.png) or a relative path (/images/some.png). You may want this to be rather small, around 16x16, similar to a favicon.
- RSS Address - URI of the RSS feed associated with the Link, which will be displayed next to the Link itself (if your Template allows it). Example: http://example.com/feed/
- Notes - Any notes you want to store, for your own internal use, about the Link. Example: Nice design, from #wordpress.
- Rating - A ranking of the Link, which can be used to sort links within Categories.
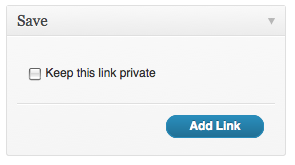
When you have set all the options you are interested in, click Add Link to add the new Link to your blogroll. You can hide a link (temporarily or permanently) by choosing "Keep this link private".
Editing Links
To edit a link, in case of an error or change in the link information, WordPress provides an Edit Link option. This is only viewable when hovering over an entry in the link's table row.
Clicking on Edit brings you to the Edit a Link subpanel.
This mode is essentially the same as the Add Link SubPanel. The only difference is that the button to save your work is called "Update Link" instead of "Add Link".
Deleting a Link
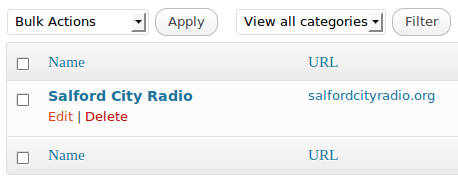
To delete a link, go to the Manage Links screen. From the table list of links, identify the link you wish to delete. Hover over this entry and click the Delete link for that link to delete it.
Remember, you will not have a chance to recover from this delete. It makes a permanent change to the database.
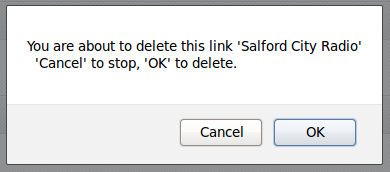
A popup window with a confirmation should appear. Choose OK or Cancel if you hit the Delete link by accident. Remember, this is the only chance you have. After making your choice, you will be directed back to the Manage Links page.
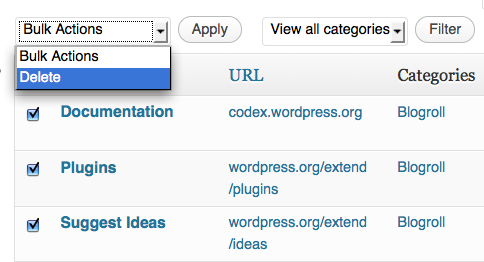
To delete multiple links you can select the tick box of link entries that you want to delete on the Manage Links screen and then select Delete from the Bulk Actions drop down menu and then click on the Apply button.
Link Categories
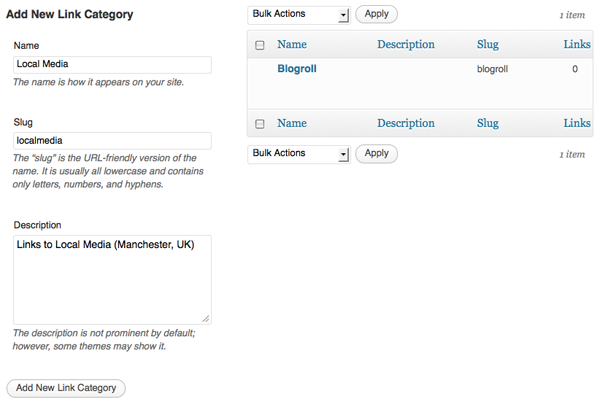
Links in WordPress can be organized into categories, all the better for organization. The default installation of WordPress automatically sets one category, Blogroll. You are given the ability to add, edit and delete categories.
- Note: There must always be at least one (default) link category. If you want to delete the Blogroll category, first set another link category as the default in the Settings Writing Screen.
Adding a Category
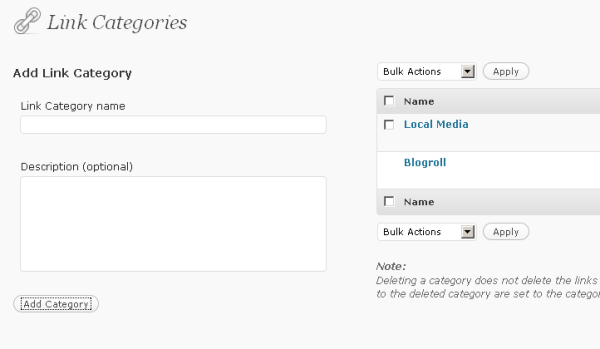
To add a Link Category navigate to the Links Link Categories Screen using the side menu
Enter the name and other details of your category.
Click on the Add New Link Category button.
A full description of how to add, edit and delete Link Categories is on the page on the Links Link Categories Screen
Formatting
In WordPress 2.0, you can alter how WordPress displays the list of links from this category by modifying the text found in the following three text boxes. However, these options are only used by some themes.
The following template tags are used only with Link Manager:
- Before Link
- This string of characters or HTML tags which will be inserted before every link in the list of links from this category.
Example: <li>
- Between Link and Description
- When a category is set to show the description with the link, this is what separates them.
Example: <br />
- After Link
- This string of characters or HTML tags which will be inserted after every link in the list of links from this category.
Example: </li>
To actually add the category, just click Add Category or Save Category Settings to save the information you've entered.
Removing the Link Manager
If you upgraded from a version prior to 3.5, you may still have the link manager in the sidebar, even if it is not needed. To remove this, edit the "Link Manager Enabled" field from 1 (on) to 0 (off) in /wp-admin/options.php or through any database manager.
Or add this code to your functions.php file:
update_option( 'link_manager_enabled', 0 );
Adding the Link Manager
To re-enable the link manager, add the following line to your theme's functions.php file:
add_filter( 'pre_option_link_manager_enabled', '__return_true' );
