Interested in functions, hooks, classes, or methods? Check out the new WordPress Code Reference!
pt-br:Painel Cabeçalho
Languages: English • Header SubPanel 日本語 Português do Brasil • (Add your language)
 |
Artigo parcialmente traduzido ou que precisa de tradução Este documento está parcialmente traduzido ou precisa ser traduzido. Toda a tradução é feita por voluntários e você pode ser um deles.
Participar ▪ Artigos para traduzir ▪ Fórum de Suporte ▪ Todos os Artigos |
Apparência → Cabeçalho
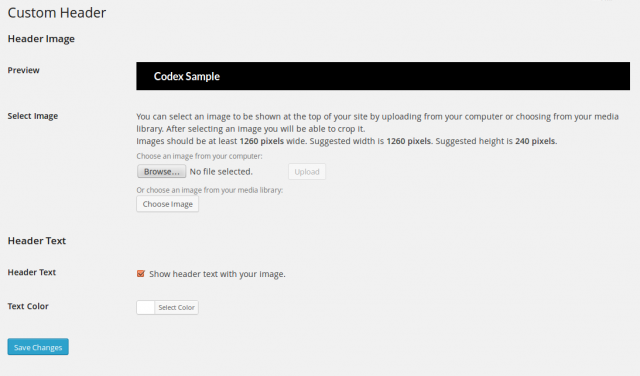
In the Appearance Header SubPanel, if allowed by your current theme, you can customize the header of your theme by uploading and configuring an image.
Header Image
- Preview
- In this box, the uploaded image, or the selected color is available for previewing.
- Upload Image
- You can upload a custom header image to be shown at the top of your site instead of the default one. On the next screen you will be able to crop the image. Images of exactly 940 × 198 pixels will be used as-is.Choose an image from your computer. Click the browse button to find the image on your local computer, then once the image is selected, click the Upload button to upload the image and display it in the Crop Header Image SubPanel. See the displays and you can crop and publish the image for use as the header image.
- Default Images
- If you don‘t want to upload your own image, you can use one of these cool headers. Check the Radio button next the desired image--Berries, Cherry Blossoms, Concave, Fern, Forest Floor, Inkwell, Path, or Sunset. These images are delivered with the WordPress Twenty Seventeen theme.
- Remove Image
- Click the Remove Header Image button to remove the header image. You will not be able to restore any customizations.
- Reset Image
- Click the Restore Original Header Image button to restore the original header image. You will not be able to restore any customizations.
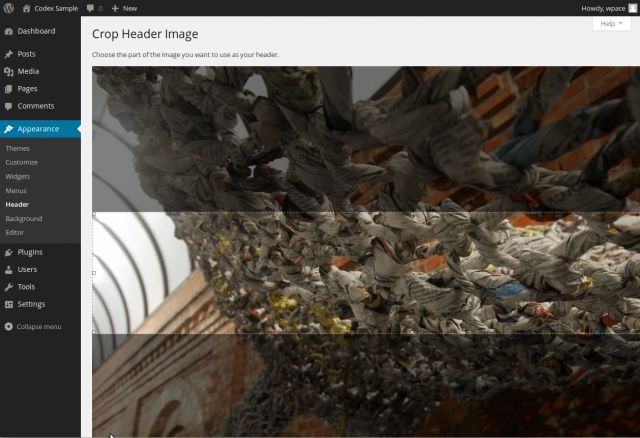
Crop Header Image
- The Crop Header Image feature allows you to select an area of an image and then delete all but that selected area. When initially displayed, WordPress shows that maximum sized crop area in a lighter shade as represented by the northern third of the US States map in this example. When using a theme such as the WordPress Twenty Seventeen theme the header image is expected to be 940 × 198 pixels so that is the size of the selected area shown. You can click, hold, and drag the lighter crop selection area and down (or up) the image to the desired point. Also, you can click one of the eight crop resizer boxes (little square box on each corner and each side) to move the crop selection area.
- Crop and Publish
- Click this button and the cropped area of the image is saved as the header image. At this point the image is displayed and the preview section a message saying Header updated. Visit your site to see how it looks. displays with a link to view your site.
Save Changes
- Click the Save Changes button to ensure any changes you have made are saved. Once you click the button, a confirmation text box will appear at the top of the page telling you your Header has been saved.
Voltar para Painéis de Administração

